

Explore Git And GitHub
A Guide For Efficient Version Control And Collaborative Development


Table of contents
- Introduction
- Installation
- Basic Commands
- Getting Started With GIT
- Getting Started With GitHub
- Connecting Project with GitHub
- Upload Files/Folders to GitHub
- Branch
- Creating New Branch
- Working On New Branch
- Forking
- Contributing With Others
- Cloning
- Checking URLs Connected To The Working Directory
- How To Add Upstream URL
- Pull Request
- Merging Pull Request
- Fetch Commits Of Upstream Repository
- Merging Many Commits To A Single Commit
- Merge Conflicts
Introduction
Git is a version control system designed to manage software development projects and other text-based files.
Developers can track changes to their code, collaborate with others, and go back to earlier versions of their code when needed.
Git stores a complete history of a project's codebase, including data about who made the change and at what time.
Developers can work on the same project at the same time, even if they are located in different locations. They can make changes to the code, then merge their changes with other developers when they are ready.
GitHub provides a user-friendly interface for managing Git repositories.
Installation
Click Here to install Git on your PC (this link redirects you to the official page of Git downloads).
Basic Commands
ls- list the files and directories in the current working directory.mkdir- create a new directory.cd- change the current working directory.pwd- display the current working directory.touch- create a new file.cp- copy a file or directory.mv- move or rename a file or directory.rm- remove a file or directory.cat- display the contents of a file.less- display the contents of a file, one page at a time.head- display the first few lines of a file.tail- display the last few lines of a file.grep- Search for a pattern in a file.echo- display a message on the screen.man- display the manual page for a command.
NOTE: There are many more commands available, and each command can have a variety of options and arguments that modify its behavior.
Getting Started With GIT
- Go to the project folder on your PC then right-click and open the terminal/git bash.
Initializing Git
The first step is to initialize the project folder to git.
git init #to initialize git
After initializing git, git provides a folder named
.gitwhere the history of all the changes made in a project is stored..gitis a hidden file.Now try these commands:
  ls #lists the files and folders present

  ls -a #lists the files and folders including the hidden ones

Creating Files
We can use the
touch filename.extensioncommand to create a new file.touch Explore.txt #creates a Explore.txt file in the current directory

Checking Status
Now as we added a new file
Explore.txt, hence there is a change in the directory.git statusis a Git command used to show the current state of a Git repository. It displays information about which files have been modified, which files are staged for commit, and which files are not being tracked by Git.git status #to check the changes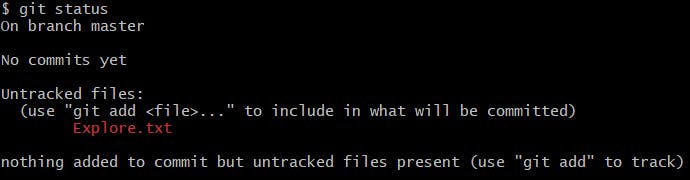
The untracked files are files in your working directory that are not being tracked by Git. This means that Git is not currently aware of these files and they have not been added to the Git repository.
Adding Changes To Git
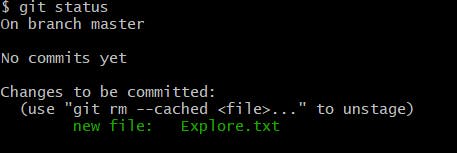
git addis a Git command used to add changes to the staging area.The staging area is an intermediate area between your working directory and the git repository, where changes are stored before they are committed to the repository.
  git add Explore.txt #to add particular file to staging area

  git add . #dot(.) means to add all the unstaged files to staged area
Now check the status of the working directory, the file is added to the staged area.
If we want to remove the file from the staging area and go back to the unstaged area:
git rm --cached Explore.txt #to remove file from staged area
Committing Changes
git commitis a Git command used to represent a snapshot of the changes to the files in the repository at a specific point in time with a clear message.The message should be a brief description of the changes made in the commit and should be written in the present tense.
git commit -m "Message" #to commit the changes made in the working directory
Now check the status, Nothing will be present

Now try adding content in the Explore.txt file then check the status.

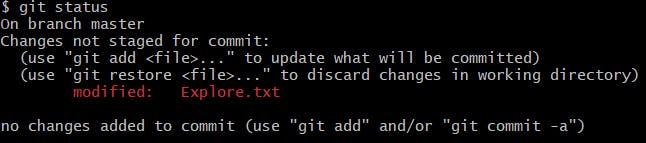
Now repeat the same process
git add .andgit commit -m "Modifying Explore.txt"
Checking The History
git logis a Git command used to display all the commit history.git log #displays the commit historygit logcommand provides information such as the author of each commit, the date and time when the commit was made, the commit message, and the unique identifier code for each commit (known as the SHA-1 hash).
Removing Commits
Delete the
Explore.txtfile from the directory usingrm -rf Explore.txtcommand.Then repeat the same process
git add .andgit commit -m "Deleting Explore.txt"Check the
git logwe will get the commit history.But if this was by mistake deletion or you do not want to commit it then we can remove it with the help of hash code present in the history.
git reset <hashcode>Which hashcode we copy and paste the history stacked above it will be removed and kept in the unstaged area.

That means now if you check
git status, you will find that deleted file is untracked.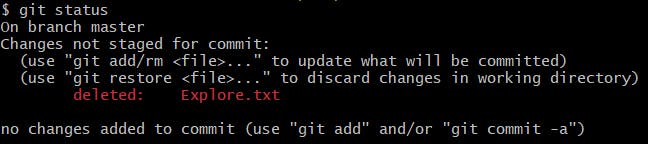
Stashing
Stashing is a feature that allows you to temporarily save changes that you have made to a repository without committing them.
git stash #temporarily keeping the change away without committingSo now let's stash the deleted
Explore.txtfile.
Now check
git status, the tree is clean.
Bringing Back The Stashed Process
Previously we have stashed the deleted
Explore.txtfile, so we need it to bring back that process.git stash pop #to bring stashed process back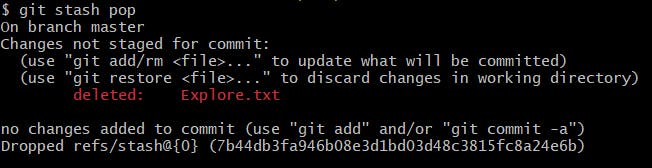
Clear The Statshed Process
If we no longer want the process to be in the stashed area.
git stash clear #to clear the process in the stash area
Getting Started With GitHub
Click Here to log in or signup for a GitHub account.
Now on the Home page in the left top/right top, we can create a new repository by clicking on the
newbutton.Next, we need to fill in the details like repository name, and an optional description, then choose whether the repository should be private or public(all can view), and finally click on
Create repository.
Connecting Project with GitHub
Now we will be getting a generated URL in GitHub which needs to be attached to the current directory which we were working on a local computer.
https://github.com/<username>/<RepositoryName>.gitUse this command in git bash to connect the local working directory to the GitHub
  git remote add origin https://github.com/<username>/<RepositoryName>.git
  #to connect project folder to github
Now our local project folder is connected to GitHub.
Upload Files/Folders to GitHub
git pushis a Git command that is used to upload local directory changes to a GitHub repository.git push origin <branch name> #to push the resourse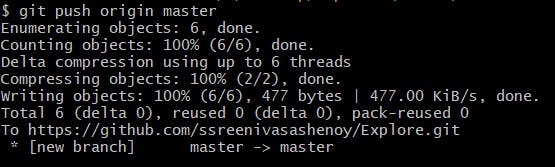
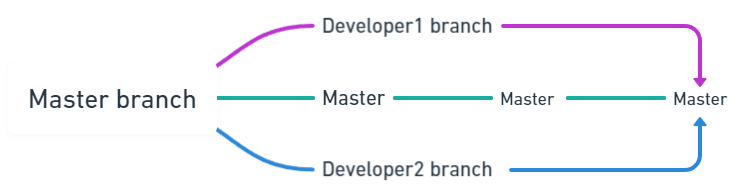
Branch
A branch is a separate development area that is different from the main codebase.
It allows multiple developers to work on different features or modifications of the codebase simultaneously without interfering with each other's work.
When a new branch is created, it is a copy of the original codebase.
Developers can make changes to their branches without affecting the master branch. Once the changes are complete, they can merge their branch back into the master branch.
NOTE: When working on a new feature or collaborating with someone always make a new branch, avoid working on the main/master branch. Because main/master branches are the default branches which is running in the real-world application and are used by multiple people, so if we are pushing our unfinalized code then it will impact the real application as our code might contain errors or bugs.
Creating New Branch
To create a new branch in Git, you can use the
git branchcommand followed by the name of the new branch.git branch <BranchName> #creating new branch

Working On New Branch
In Git there is a term called Head. "HEAD" is essentially a pointer that refers to the current branch or commit that you are working on.
Previously we created a new branch but still, the head will be pointing to the main/master branch.

git checkoutis used to point to the required branch.git checkout <BranchName> #to change the branch

Now you are working on
featurea branch and whatever commit and any changes you make are related to this branch.
Forking
Forking refers to creating a copy of a repository on your GitHub account, allowing you to make changes without affecting the original project.
This forking is done because none of the strangers should come and change the code in your repository without any permissions. This may even lead to the stopping of real-world applications.
When you fork a repository, you create a copy of the entire repository, including its history and branches.
So work in your repository and then convey the changes.
This creates a new repository that is linked to the original repository, allowing you to pull changes from the original repository and push changes to your forked repository.
You can then submit a pull request to the original repository owner, who can review and potentially merge your changes into the main codebase.
Forking is a powerful feature in Git that enables collaboration and open-source development, as it allows anyone to make contributions to a project without requiring direct access to the original codebase.
Contributing With Others
Firstly we need to fork their repository, then we can see that a copy[same to same no changes at all] of their repository is made in our account.
Now from our repository clone the project.
Cloning
Cloning refers to creating a copy of a Git repository on your computer. When you clone a repository, you download all the files, branches, and history of the repository to your PC.
To clone a repository, Click on
Codeand copy the URL present there.Then use the
git clonecommand followed by the copied URL of the repository.git clone https://github.com/<username>/<RepositoryName>.git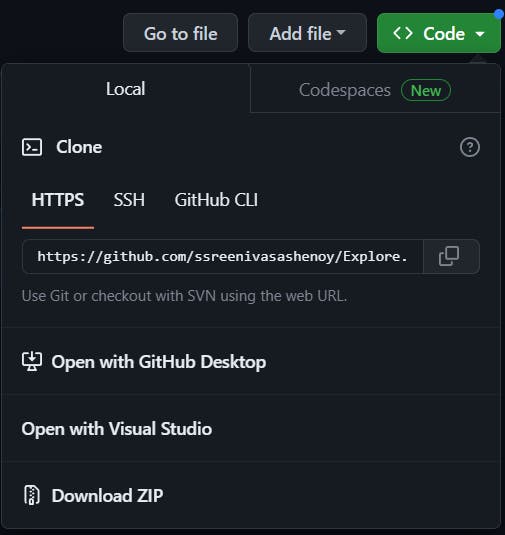
This command creates a new directory on your PC with the same name as the repository and downloads all the files and history of the repository into that directory.
Once you have cloned a repository, you can work with the code on your local machine, make changes, and push those changes back to the remote repository when you are ready to share your work.
NOTE: [IMPORTANT!!!] From where you are forking, the URL present there in the code section is called an Upstream URL
Checking URLs Connected To The Working Directory
git remotecommand shows a list of all the linked remote repositories that are associated with your GitHub, along with their corresponding URLs.git remote -v #to show all the linked repositories
How To Add Upstream URL
The term "upstream" refers to the original remote repository that a local repository was cloned from. The upstream repository is typically used as a reference point for fetching updates and pushing changes.
git remote addcommand is used to add the URL.git remote add upstream https://github.com/<username>/<RepositoryName>.gitNow if u check
git remote -vcommand you will have 4 links:2 links are your account forked repository links (fetch and push)
rest 2 links are the original repository links (fetch and push)
Pull Request
So pushing your code to upstream will require permission from the owner. So this permission is called a "Pull Request".
Pull request is a feature that allows developers to propose changes to a codebase essentially requesting to merge changes from one branch to another.
When a developer creates a pull request, they are asking the repository owner or the project maintainers to review the changes and they can suggest you the changes and then later when satisfied merge them into the main codebase.
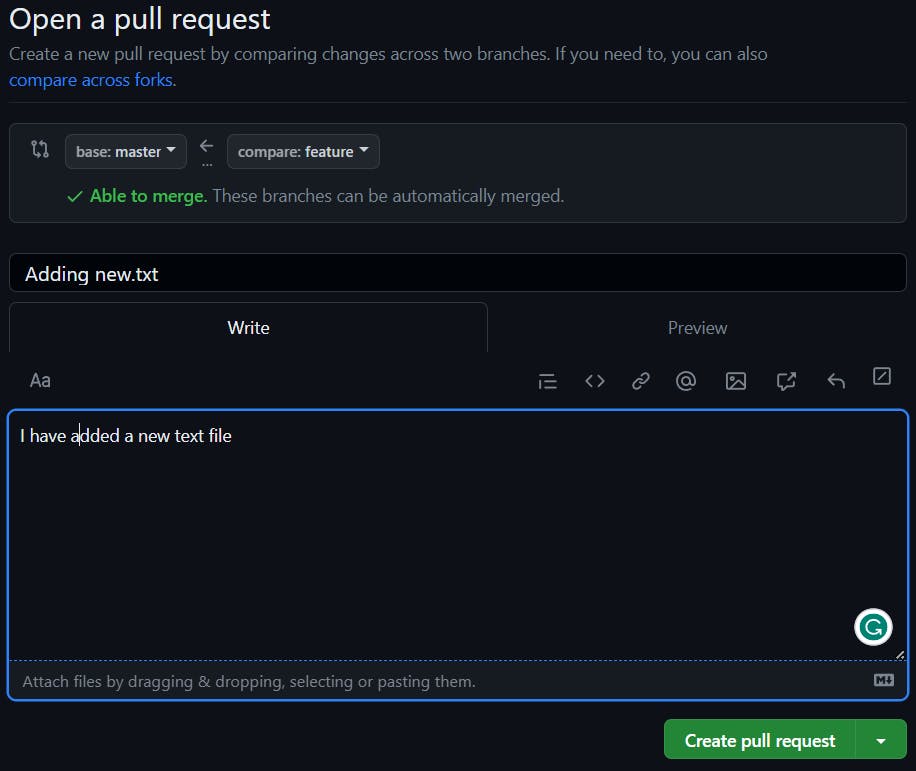
So now I added a commit in the new branch called as a
featureand push the code into the feature branch, and this was the message shown on the GitHub master branch.
So you can make a pull request with a comment to add the feature branch code to the master branch.
NOTE: Now if I commit one more change in the feature branch and push that changes will be considered with the previously made pull request, a new pull request cannot be made. You can see that 2 commits on 1 pull request.

So 1 branch 1 pull request at a time until merged. Hence this is one more reason why we should not push code directly to the main instead use a different branch.
Merging Pull Request
Merging a pull request is the process of incorporating the changes proposed in a pull request into the target branch of a Git repository.
Once a pull request has been reviewed and approved by the repository owner or project maintainers, the changes can be merged into the main codebase.
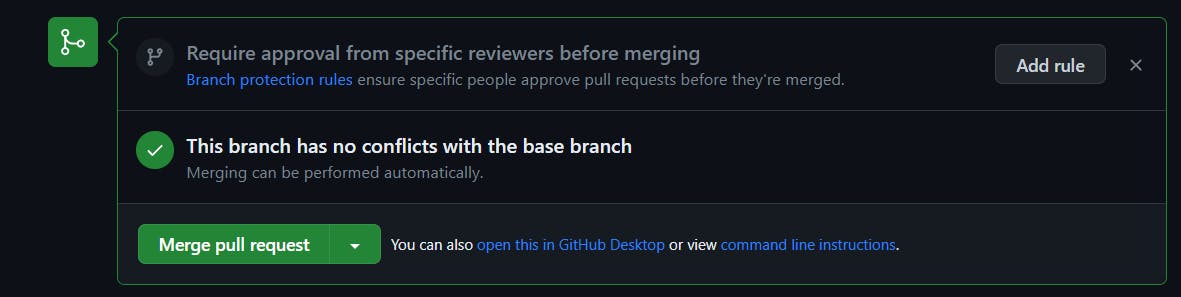
Just click on
Merge pull requestand the code will be merged into the main/master branch.
Fetch Commits Of Upstream Repository
Fetching commits from the upstream repository refers to the process of retrieving changes made to the repository that you originally cloned from.
To fetch the latest changes from the upstream repository,
  git fetch --all --prune #prune means even deleted will be fetched
  git reset --hard upstream/main #to get code similar as that of upstream main branch
  git push origin main #now you are pushing code to your account main branch
An easy and alternative method for this is
  git pull upstream main #fetches all the code and resets the main branch code
  git push origin main #now you are pushing code to your account main branch
Merging Many Commits To A Single Commit
It is possible to merge many commits into a single commit using the interactive
rebasefeature. This can be useful when you have a series of commits that are related to the same feature or issue, and you want to combine them into a single commit before pushing your changes.git rebase -i <hashcode> #to make a single commit
- Here I used the hashcode of file 1.
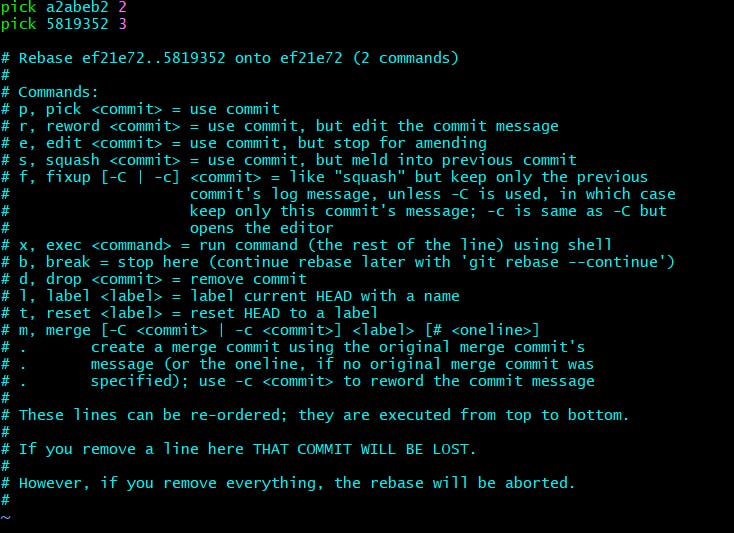

- Squashed files 2 and 3 in commit 1.
Merge Conflicts
Merge conflict occurs when two or more branches that are being merged have made conflicting changes to the same file or line of code. Git is unable to automatically resolve these conflicts, as it does not know which version of the code should be kept.
So the solution for this is open the code manually by clicking on resolve conflicts in GitHub and make the required changes and then click mark it resolved and commit the merge.